OK - you don't have to draw every pixel yourself, you can take any image you like and quite easily convert it.
Here's a tutorial for Photoshop (CS4) using this banksy image:

1. Find your image, copy it to the clipboard.
2. Create a new document in Photoshop. The preset drop down should be set to 'Clipboard', if it isn't, make sure the new document is the same dimensions as the image you've copied.
3. Paste the image in, and convert it to greyscale using Image > Mode > Greyscale
4. The image will look black and white, but in reality there's lots of greys that will make the image look funny when you convert it to a 2-Colour (B+W) bitmap. To change this, get the Levels window up (Image > Adjustments > Levels). You should see a graph, with three little arrows under it, a black one, a grey one and a white one. Drag the black and white arrows in towards the grey one. This is sort of like increasing the contrast - dark colours will become blacker and light colours will become whiter. Adjust so that the image is fairly two-tone, but not so you can't see what it is. For this image, the values I set were: 100, 1.00, 148
5. If you're using the image above, and you used my values, you'll notice a weird white square to the right of the dude - I brushed this out with a black brush.
6. Now convert the image to a bitmap by going Image > Mode > Bitmap. In the dialogue box, enter 180 pixels/inch for the Output resolution.
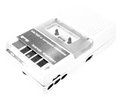
7. Now we need to size the image to fit the MPC. The image needs to be 240 x 64. For this image, I first resized the image (Image > Image Size) so that it was 102 x 64 and then increased the canvas size (Image > Canvas Size) to the left so it was 240 x 64. This leaves a nice big area to put some text in (like your name).
Here's the image so far (minus any text, so you can add your own if you're too lazy to follow the tut).
 Note: If you copy this image it's actually a 72dpi so you'll need to convert it to a 180dpi BMP
 8. Remember that when you put it on the MPC white is black and black is white. This image looks better with a black background, so invert it by going Image > Adjustments > Invert
Here's the inverted image, also a 72dpi JPG, so if you're gonna use this, don't forget to convert it.

9. Save the image as 'MPC1000.BMP' in the top directory of your compact flash (saving on your MPC's hard drive won't work).
Here's the BMP saved down and zipped:
http://stashbox.org/590100/MPC1000.zipIf anyone has any problems, feel free to PM me.
And yes, i'm a graphic designer. That is until making dusty boom bap starts bringing home the bacon.